We’ve all accidentally toppled a tasty beverage over our keyboard at some point. And if there’s one thing that can quickly ruin even the best keyboards, it’s liquid, debris, or crumbs that get in between the keys. So for anyone needing to learn quickly how to clean a mechanical keyboard, we’ll explain.
KEY TAKEAWAYS:
- Keyboards need to be cleaned whenever crumbs, dust buildup, or liquid gets under the keycaps.
- To clean out dust and dry crumbs, use a handheld vacuum or canned air.
- To clean liquid spills, remove the keycaps. Then use a damp cloth with soapy water to wipe the switches.
If you own an Apple device and want a guide specifically tailored to your brand, we also have an article that covers how to clean a MacBook keyboard.
How to Clean Your Mechanical Keyboard
Cleaning is a big part of knowing how to fix keyboard keys. And the cleaning to perform depends on the mess at hand. For example, a sugary liquid might cause you to use a method that requires knowing how to unstick keyboard keys. In contrast, getting rid of dust and crumbs requires a different procedure.
Insider Tip
If you’re cleaning individual keycaps, make sure they are completely dry before replacing them.
We also have a great educational guide for those who want to take the leap and learn how to build their own keyboard.
- Difficulty: Easy
- Time Required: 10 minutes – 1 hour (depending on the type of cleaning)
- Total Steps: Between 2 and 4 (depending on method)
- Tools Needed: Compressed Air, Microfiber Cloth, Rubbing Alcohol, Keycap Puller, Vacuum, Brush
Cleaning Crumbs and Dust
STEP 1
Unplug your keyboard from the computer. Then turn the keyboard upside down and use the can of compressed air and spray in a zig-zag pattern. Go over the keyboard twice to knock out loose debris.
STEP 2
If you are cleaning a laptop keyboard, first turn it upside down and clean it with compressed air. Then, turn the laptop on its left and right sides and spray again.
STEP 3
If you don’t have a can of compressed air, you can use a vacuum cleaner and run it over the keypad.
STEP 4
Then, take a cloth with isopropyl alcohol and clean the keys.
STEP 5
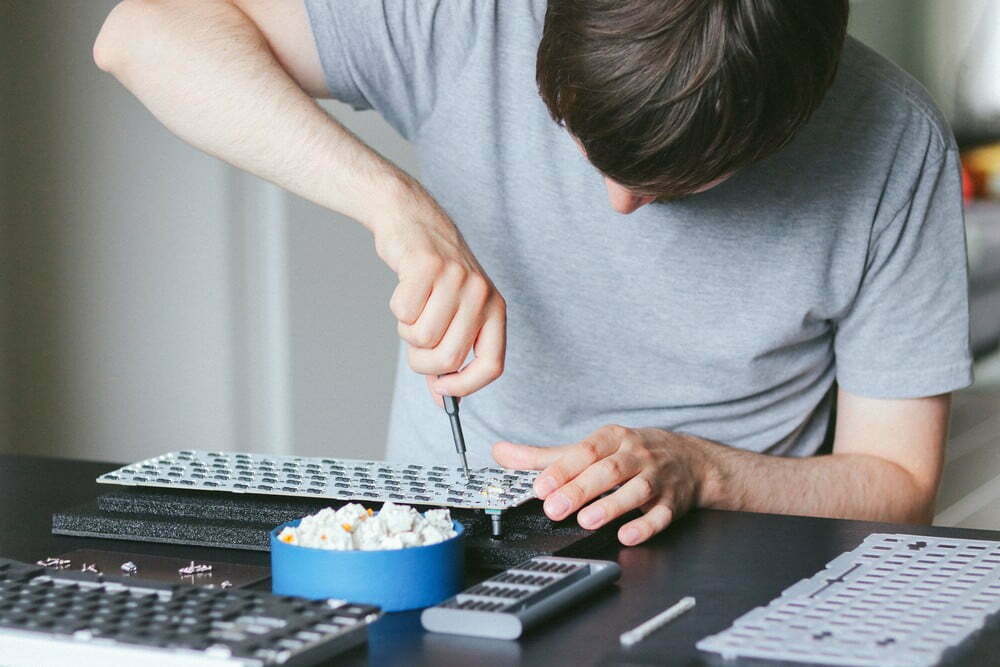
If specific keys are dirty, you can take a keycap puller to remove them. Then, take a vacuum or a small brush and go over the dirty switches.
Cleaning a Liquid Spill
STEP 1
Take a cloth or paper towel and dab it over the liquid to absorb as much as possible. Then leave it there to continue soaking up the liquid.
STEP 2
Remove the keycaps from the keyboard, turn them upside down and leave it to dry.
STEP 3
Take a damp cloth with warm water and wipe it over the key switches. If it’s sticky, continue to use hot water with mild dish soap and wipe until the residue is gone.
STEP 4
Let the keyboard dry. As this dries, clean the individual keycaps.
STEP 5
Warning
It’s not a good idea to place a keyboard in a room with high humidity levels, such as a laundry or bathroom, as this could damage it.
Replace the keycaps, and test if the keyboard still works.
F.A.Q.S
How often should I clean my keyboard?
If you eat over your keyboard, you should clean it every week. And for sanitary purposes, you should also clean with disinfectant every week.
Can you put a keyboard in the dishwasher?
Never place your keyboard in the dishwasher. The water will ruin the electronics.
Does cleaning a keyboard make it work better?
Often, cleaning a keyboard will boost its responsiveness, which can be important for things like gaming or work that involves a lot of typing.
STAT: Many manufacturers suggest that it’s good to sanitize and clean your keyboard once a week to keep germ levels down. (source)
REFERENCES:
- https://www.hp.com/us-en/shop/tech-takes/how-to-clean-mechanical-keyboard#:~:text=You%20should%20give%20your%20keyboard,with%20a%20damp%20microfiber%20cloth.
- https://www.youtube.com/watch?v=_M42Ri3dqoc
- https://www.daskeyboard.com/blog/updated-guide-how-to-clean-a-mechanical-keyboard/r
- https://www.whirlwindfx.com/blogs/guides/how-to-clean-a-mechanical-keyboard
- https://www.rockpapershotgun.com/how-to-clean-your-keyboard




![Best Keyboard in [year] ([month] Reviews) 27 Best Keyboard in 2026 (January Reviews)](https://www.gadgetreview.dev/wp-content/uploads/best-keyboard-image.jpg)
![Best BenQ Monitors in [year] 28 Best BenQ Monitors in 2026](https://www.gadgetreview.dev/wp-content/uploads/best-benq-monitor-image.jpg)
![Best Computer Accessories in [year] ([month] Reviews) 29 Best Computer Accessories in 2026 (January Reviews)](https://www.gadgetreview.dev/wp-content/uploads/Computer-accessories.jpg)
![Best Wireless Keyboards in [year] ([month] Reviews) 30 Best Wireless Keyboards in 2026 (January Reviews)](https://www.gadgetreview.dev/wp-content/uploads/best-wireless-keyboards-image.jpg)
![10 Best Mechanical Keyboards for Typing in [year] 31 10 Best Mechanical Keyboards for Typing in 2026](https://www.gadgetreview.dev/wp-content/uploads/Best-Mechanical-Keyboard-for-Typing.jpg)
![10 Best Keyboards for Designers in [year] 32 10 Best Keyboards for Designers in 2026](https://www.gadgetreview.dev/wp-content/uploads/Best-Keyboard-for-Designers.jpg)
![10 Best Keyboards for Editing in [year] 33 10 Best Keyboards for Editing in 2026](https://www.gadgetreview.dev/wp-content/uploads/Best-Keyboard-for-Editing-scaled-1.jpg)
![10 Best Keyboards Android in [year] 34 10 Best Keyboards Android in 2026](https://www.gadgetreview.dev/wp-content/uploads/Best-Keyboard-Android.png)
![10 Best Keyboards for iPhone in [year] 35 10 Best Keyboards for iPhone in 2026](https://www.gadgetreview.dev/wp-content/uploads/Best-Keyboard-for-iPhone.jpg)
![11 Best Mechanical Keyboards in [year] 36 11 Best Mechanical Keyboards in 2026](https://www.gadgetreview.dev/wp-content/uploads/best-mechanical-keyboard.jpg)
![10 Best Membrane Keyboards in [year] 37 10 Best Membrane Keyboards in 2026](https://www.gadgetreview.dev/wp-content/uploads/Best-Membrane-Keyboard.jpeg)
![10 Best Ergonomic Keyboards in [year] 38 10 Best Ergonomic Keyboards in 2026](https://www.gadgetreview.dev/wp-content/uploads/Best-Ergonomic-Keyboard.jpg)
![10 Best Typewriter Keyboards in [year] 39 10 Best Typewriter Keyboards in 2026](https://www.gadgetreview.dev/wp-content/uploads/Best-Typewriter-Keyboard.jpg)
![10 Best Keyboards for Programming in [year] 40 10 Best Keyboards for Programming in 2026](https://www.gadgetreview.dev/wp-content/uploads/Best-Keyboard-for-Programming-1.jpg)
![10 Best Chiclet Keyboards in [year] 41 10 Best Chiclet Keyboards in 2026](https://www.gadgetreview.dev/wp-content/uploads/Best-Chiclet-Keyboard.png)
![10 Best Hot Swappable Keyboards in [year] 42 10 Best Hot Swappable Keyboards in 2026](https://www.gadgetreview.dev/wp-content/uploads/Best-Hot-Swappable-Keyboard.jpg)
![10 Best Quiet Keyboards in [year] 43 10 Best Quiet Keyboards in 2026](https://www.gadgetreview.dev/wp-content/uploads/best-quiet-keyboards.jpg)

