Key Takeaways:
- Hoverboards can be customized by painting them.
- Spray paint is the best option to ensure smooth, even coats.
- Take your time, prepare the board, and wait between coats to prevent streaks and drips.
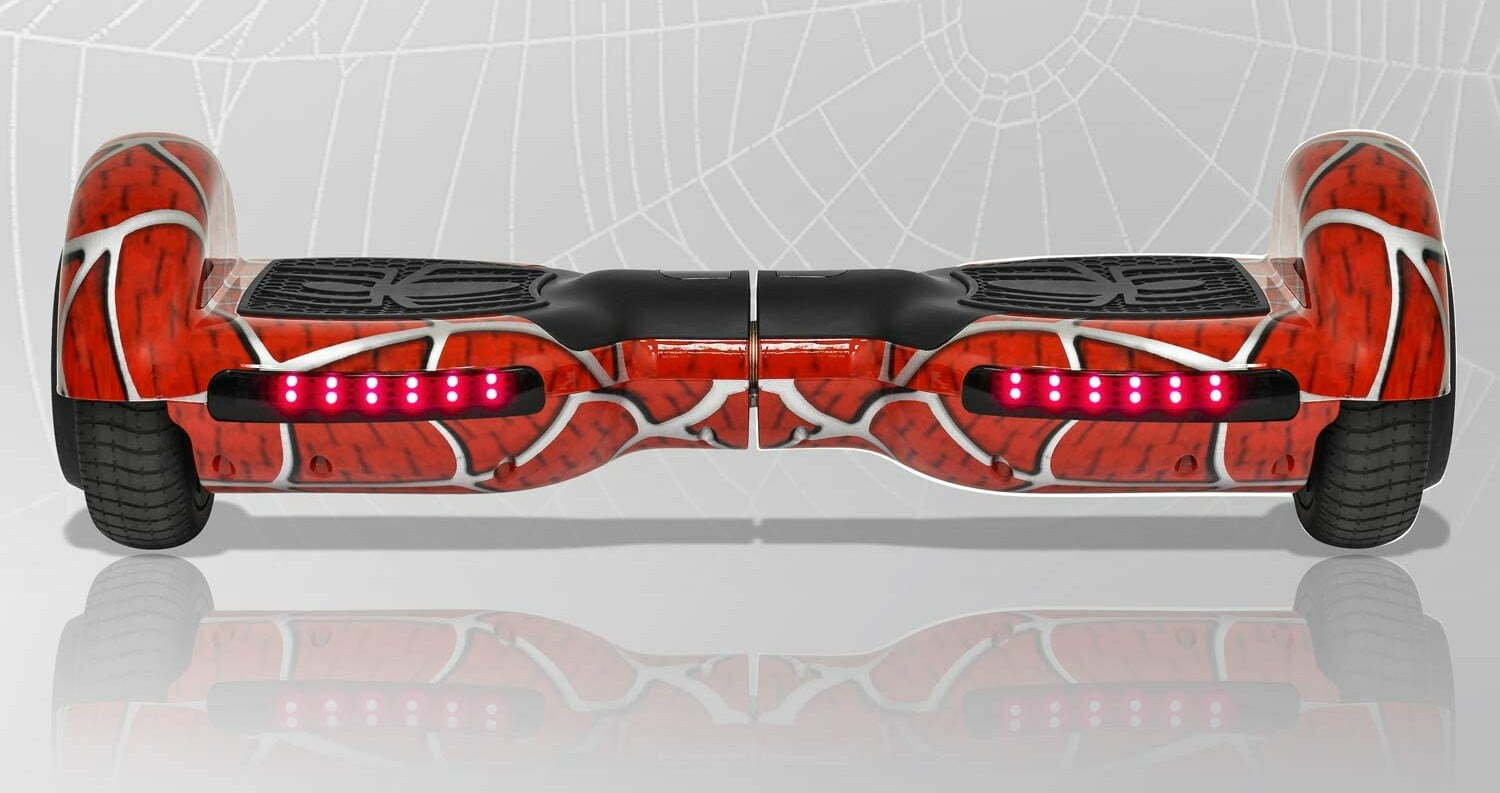
Not everyone wants a new hoverboard that looks like it came straight from the factory assembly line. Depending on your tastes, you might want to customize your hoverboard so that it reflects your personality and looks unique. While there are a lot of options you can choose for customizing your ride, painting a hoverboard is also a popular choice for many people.
How to Paint Your Hoverboard
Of all of the modification options, painting your hoverboard will take the longest as you’ll need to prep, paint, and wait for it to dry thoroughly before you begin using it again.
Cover areas you don’t want to paint
First, you need to cover or tape all of the areas that you don’t want to paint. This can include any exposed parts of the wheels, LEDs, rubber foot pads, buttons, or even connectivity ports. If you get paint on any access points for circuitry, there’s the risk that your hoverboard may no longer work. Also, make sure to wipe down any remaining exposed areas to ensure that they’re not dirty. This will help ensure even coverage.
Tip: First, you need to cover or tape all of the areas that you don’t want to paint
Tip: If you get paint on any access points for circuitry, there’s the risk that your hoverboard may no longer work
Related Posts:
Prepping your hoverboard surface
Now that you’ve covered the areas you don’t want to paint, make sure to wipe down any remaining exposed areas to ensure that they’re not dirty. Likewise, if your hoverboard is older and has scratches, you’ll want to use some sandpaper to smooth those areas out. This will help ensure even coverage.
Tip: make sure to wipe down any remaining exposed areas to ensure that they’re not dirty. Likewise, if your hoverboard is older and has scratches, you’ll want to use some sandpaper to smooth those areas out
Don’t Apply Paint to Dirty Surfaces
If you want your modification job to last, it’s always best to work on a clean dry surface. You want to make sure that your hoverboard is clean and free from dust or dirt which can create texture when you paint. Likewise, a dirty hoverboard may lead to missed spots when you use spray paint.
Find a safe surface to begin
Ideally, lay down newspapers or cardboard to ensure you don’t accidentally spray the floor or ground.
Paint, dry, repeat
Once you’re ready to begin, apply an even coating of paint to all exposed surfaces. Once you’ve thoroughly covered the hoverboard with an initial layer, let it dry. Dry times can vary by spray paint brand so follow the instructions on the can. Follow up with a second layer to ensure that you’ve fully covered the hoverboard and let it dry again. Once dry, remove the tape, and hit the road.
Tip: Dry times can vary by spray paint brand so follow the instructions on the can
STAT:
Before spraying, you must tape over all the areas you don’t wish to paint (just like you do when painting walls). Usually, this would be the footpads, LEDs, wheels, and any buttons/connectivity ports. (eRide Hero)
Spray on from 3-4 coats, waiting a few minutes in between each coat. If you need to move the pieces to another location, wait 15-20 minutes until this part is dry to the touch. For the paint to fully cure, let sit for 24 hours. (Instructables)
Sources:
*https://www.youtube.com/watch?v=XjoEI86um-Q
*https://www.youtube.com/watch?v=SWsxQWacPLc
https://eridehero.com/blog/how-to-customize-a-hoverboard/
https://www.instructables.com/How-to-Restore-a-Scuffed-Up-Hoverboard/






![Best 10 Inch Hoverboards in [year] 27 Best 10 Inch Hoverboards in 2025](https://www.gadgetreview.dev/wp-content/uploads/best-10-inch-hoverboard-image.jpg)
![Best Single Wheel Hoverboards in [year] 28 Best Single Wheel Hoverboards in 2025](https://www.gadgetreview.dev/wp-content/uploads/best-single-wheel-hoverboard-image.jpg)
![Best 8 Inch Hoverboards in [year] 29 Best 8 Inch Hoverboards in 2025](https://www.gadgetreview.dev/wp-content/uploads/best-8-inch-hoverboard-image.jpg)
![Best Hoverboards for Girls in [year] 30 Best Hoverboards for Girls in 2025](https://www.gadgetreview.dev/wp-content/uploads/best-hoverboards-for-girls-image.jpg)
![Best Hoverboards for Adults in [year] 31 Best Hoverboards for Adults in 2025](https://www.gadgetreview.dev/wp-content/uploads/best-hoverboard-for-adults-image.jpg)
![Best Hoverboard Accessories in [year] 32 Best Hoverboard Accessories in 2025](https://www.gadgetreview.dev/wp-content/uploads/best-hoverboard-accessories-image.jpg)
![Best 6.5 Inch Hoverboards in [year] 33 Best 6.5 Inch Hoverboards in 2025](https://www.gadgetreview.dev/wp-content/uploads/best-6.5-inch-hoverboard-image.jpg)
![Best Bluetooth Hoverboards in [year] 34 Best Bluetooth Hoverboards in 2025](https://www.gadgetreview.dev/wp-content/uploads/best-bluetooth-hoverboards-image.jpg)
![Best Knee Pads for Hoverboards in [year] 35 Best Knee Pads for Hoverboards in 2025](https://www.gadgetreview.dev/wp-content/uploads/best-knee-pads-for-hoverboard-image.jpg)
![Best Hoverboard for Beginners in [year] 36 Best Hoverboard for Beginners in 2025](https://www.gadgetreview.dev/wp-content/uploads/best-hoverboards-for-beginners-image.jpg)
![Best Helmets for Hoverboards in [year] 37 Best Helmets for Hoverboards in 2025](https://www.gadgetreview.dev/wp-content/uploads/best-helmet-for-hoverboard-image.jpg)
![Best Hoverboard Carrying Bags in [year] 38 Best Hoverboard Carrying Bags in 2025](https://www.gadgetreview.dev/wp-content/uploads/best-hoverboard-carrying-bag-image.jpg)
![Best Hoverboard Seats in [year] 39 Best Hoverboard Seats in 2025](https://www.gadgetreview.dev/wp-content/uploads/best-hoverboard-seat-image.jpg)
![Best Hoverboard in [year] ([month] Reviews) 40 Best Hoverboard in 2025 (December Reviews)](https://www.gadgetreview.dev/wp-content/uploads/best-hoverboard-image.jpg)
![Fastest Hoverboard in [year] ([month] Reviews) 41 Fastest Hoverboard in 2025 (December Reviews)](https://www.gadgetreview.dev/wp-content/uploads/fastest-hoverboard-epikgo.jpg)
![Best Hoverboard For Kids in [year] ([month] Reviews) 42 Best Hoverboard For Kids in 2025 (December Reviews)](https://www.gadgetreview.dev/wp-content/uploads/Best-Hoverboards-For-Kids.jpg)
![Best RV Battery in [year] ( [month] Reviews) 44 Best RV Battery in 2025 ( December Reviews)](https://www.gadgetreview.dev/wp-content/uploads/best-rv-battery.jpg)
![Razor Hovertrax 2.0 Hoverboard Review in [year] 54 Razor Hovertrax 2.0 Hoverboard Review in 2025](https://www.gadgetreview.dev/wp-content/uploads/Razor-Hovertrax-2.0-Hoverboard-Review.jpg)
