To keep your high-end eBike in the best condition, you will need to know how to test the battery on an electric bicycle. Just like with phones, laptops, and any other battery-powered tech, the overall health of your electric battery can have a powerful impact on how the entire machine performs. Thankfully, performing that checkup is made much easier with the help of a multimeter.
Key Takeaways:
- You will want to test your battery for load, voltage, current, and resistance.
- Do not test on the AC setting, as this could damage the battery.
- If voltage reads roughly ten volts under your overall ideal battery level, then your Bike Monitoring System may need attention.
Difficulty: Easy
Time Required: 10 minutes
Total Steps: 5
Tools Needed: A multimeter and your electric bike’s battery manual.
What is a Multimeter?
A multimeter, also called a multitester, is a small handheld probe that measures voltage, current, and resistance. A screen on your device will display each readout. While digital and analog multimeters exist, the former tends to garner more accurate results.
How To Test Your Electric Bikes Battery
Testing an e-bike battery is fairly simple. Once you have a good multimeter at your disposal, you will be able to keep tabs on your overall battery health with ease.
1: Connect the Multimeter
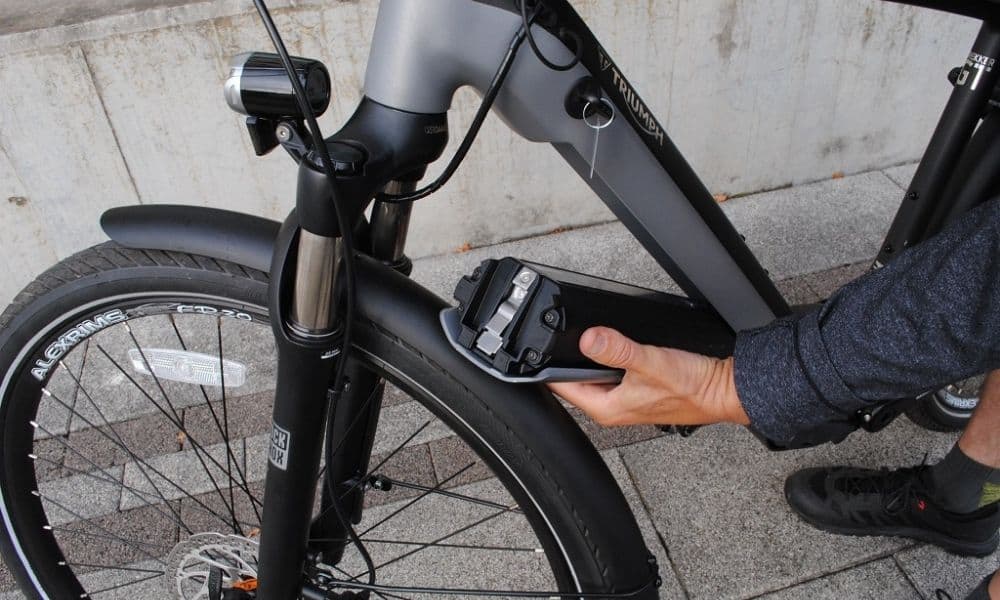
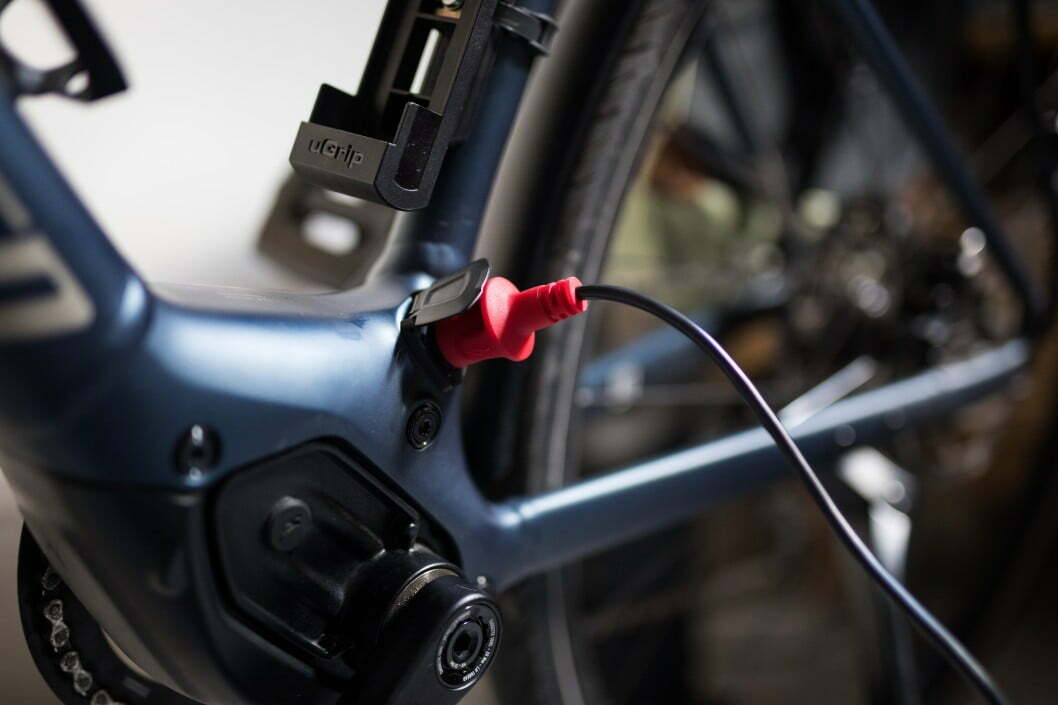
The battery will need a full charge for this process– about 6 to 8 hours of at least. If your battery pack cannot disconnect from your bicycle’s frame, make sure that the bike is steadied in place. Insert the multimeter into the connector or adapter port. Be sure not to force it or apply excess pressure, as this could damage either device.
2: Test Load Battery
Most standard multimeters have an AC/DC readout function and a ‘test load battery’ feature. Set your multimeter to DC. It is generally not advised to use AC, as it could overload your e-bike battery. This reading is not just the ability for the battery to turn on, but the energy density required to communicate with the motors and other applications of the entire bike.
3: Test the Voltage
Run your battery voltage test by switching the multimeter to the volts function. Consult with the manual to find what the voltage range is for your brand. If you’ve charged it for several hours, your voltage should match the listed figure in your manual. When your electric bike battery goes below a specific voltage reading, it will usually shut off to prevent damage to the device. That is when you’d receive a prompt to recharge. If the voltage is too low – usually ten or more volts below the figure listed in your manual- but the bike is still on, then the Bike Monitoring System may need attention.
4: Test the Current
Next, you’ll be testing the current. The current is how much energy and charges your e-bike battery can hold and the amount of power discharged per hour. You’ll be looking at the longevity of your battery life here. Compare the reading on the meter to that of your manual. If you find that you’ve been running out of power too quickly on rides, it could be that there is excess discharge from your e-bike’s battery.
5. Check the Resistance
Finally, test the resistance. Resistance is the amount of restriction a battery has and will directly impact the current. It should be the final setting on your meter. If you find your resistance is high, this could be the reason for overheating issues.
Related Posts:
STAT:
- Some experts predict that e-bikes featuring lithium-ion batteries will account for about 60% of all e-bikes sold in 2023. (juicedbikes.com)
- The ideal charging level for a battery is between 30% and 60%. (bosch-ebike.com)
Sources:
https://delfastbikes.com/blog/how-to-test-an-e-bike-battery
https://batteryuniversity.com/learn/article/rising_internal_resistance#:~:text=Measured%20in%20milliohms%20(m%CE%A9)%2C,less%20restriction%20the%20pack%20encounters.&text=Low%20resistance%2C%20delivers%20high%20current,on%20load%3B%20battery%20heats%20up.
http://physics.bu.edu/py106/notes/Ohm.html#:~:text=The%20voltage%20of%20a%20battery,is%20known%20as%20a%20current.



![Best Batteries for Electric Bikes in [year] 7 Best Batteries for Electric Bikes in 2025](https://www.gadgetreview.dev/wp-content/uploads/best-battery-for-electric-bike.jpeg)





![Best Electric Bike in [year] ([month] Reviews) 27 Best Electric Bike in 2025 (December Reviews)](https://www.gadgetreview.dev/wp-content/uploads/elby-s9-750x422-1.png)
![Best Bikes in [year] ([month] Reviews) 28 Best Bikes in 2025 (December Reviews)](https://www.gadgetreview.dev/wp-content/uploads/cheapest-electric-bikes-1.jpg)
![Best Front Drive Electric Motor Bikes in [year] 29 Best Front Drive Electric Motor Bikes in 2025](https://www.gadgetreview.dev/wp-content/uploads/best-front-drive-electric-motor-bikes-image.jpg)
![Best Cannondale Electric Bikes in [year] 30 Best Cannondale Electric Bikes in 2025](https://www.gadgetreview.dev/wp-content/uploads/best-cannondale-electric-bikes-image.jpg)
![Best Luna Cycle Electric Bikes in [year] 31 Best Luna Cycle Electric Bikes in 2025](https://www.gadgetreview.dev/wp-content/uploads/Luna-Cycle-Apex-Electric-Bike.webp)
![Best Rad Power Electric Bikes in [year] 32 Best Rad Power Electric Bikes in 2025](https://www.gadgetreview.dev/wp-content/uploads/best-rad-power-electric-bikes-image.jpg)
![Best Rear Drive Motor Electric Bikes in [year] 33 Best Rear Drive Motor Electric Bikes in 2025](https://www.gadgetreview.dev/wp-content/uploads/best-rear-drive-motor-electric-bikes-image.jpg)
![Best Ebike Conversion Kits in [year] 34 Best Ebike Conversion Kits in 2025](https://www.gadgetreview.dev/wp-content/uploads/best-ebike-conversion-kit.jpg)
![Best Electric Bike Locks in [year] 35 Best Electric Bike Locks in 2025](https://www.gadgetreview.dev/wp-content/uploads/best-electric-bike-locks-image.jpg)
![Ebikes with Longest Range in [year] 36 Ebikes with Longest Range in 2025](https://www.gadgetreview.dev/wp-content/uploads/best-ebike-with-longest-range-image.jpg)
![Best Electric Bike Trailers in [year] 37 Best Electric Bike Trailers in 2025](https://www.gadgetreview.dev/wp-content/uploads/best-electric-bike-trailers-image.jpg)
![Best Bike Rack for Electric Bikes in [year] 38 Best Bike Rack for Electric Bikes in 2025](https://www.gadgetreview.dev/wp-content/uploads/best-bike-rack-for-electric-bikes-image.jpg)
![Best Electric Bike Helmets in [year] 39 Best Electric Bike Helmets in 2025](https://www.gadgetreview.dev/wp-content/uploads/best-electric-bike-helmets-image.jpg)
![Best Throttle Electric Bikes in [year] 40 Best Throttle Electric Bikes in 2025](https://www.gadgetreview.dev/wp-content/uploads/best-throttle-electric-bike-image.jpg)
![Lightest Electric Bikes in [year] 41 Lightest Electric Bikes in 2025](https://www.gadgetreview.dev/wp-content/uploads/lightest-electric-bike-image.jpg)
![Best Schwinn Electric Bikes in [year] 42 Best Schwinn Electric Bikes in 2025](https://www.gadgetreview.dev/wp-content/uploads/Electric-Bikes-image.jpg)
![Best All Terrain Electric Bikes in [year] 43 Best All Terrain Electric Bikes in 2025](https://www.gadgetreview.dev/wp-content/uploads/best-all-terrain-electric-bike-image.jpg)
![Best Cheapest Electric Bikes in [year] 44 Best Cheapest Electric Bikes in 2025](https://www.gadgetreview.dev/wp-content/uploads/cheapest-electric-bikes.jpg)

