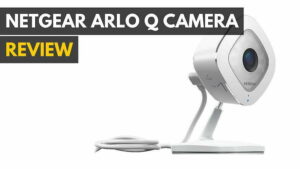
Netgear knows a lot about what makes the best home security camera.
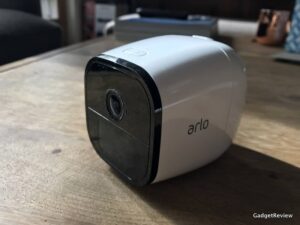
Until very recently wireless security cameras have been a complete falsehood. A misnomer if you will. Put otherwise, all wireless security cameras require a wire to power them. Until now. Enter the Arlo smart home wireless security cameras from Netgear.
The Arlo is 100% wireless. It runs off a battery, albeit an awkward one; the CR123A. They were, and perhaps are, still largely used in photography, so they’re available on a some what ubiquitous level, though you probably won’t find them in your grocer’s aisle.
Setup is simple. As is operation. Keep reading for my full Arlo Wireless Security Camera Review one of many smart home security cameras on the market today.
Overview
Summary: Super fast and easy installation and they’re 100% wireless unlike any other security camera on the market.
Price: $159+ on Amazon
Available: Now
What I Liked:
- Fast and easy installation
- Zero Wires + Waterproof
- Easy to use app with customizable notifications
What I Didn’t:
- Powered by batteries that will have to be changed
- No color night vision
- Camera only secured to mount by magnets making them easy to steal
Installation
For me, installing the Arlo wasn’t more than a 15 minute process. Another camera that you can install in minutes is described in the Blink xt2 3 camera system review.
First, just drop in the included batteries. The battery door can be bit finicky, but rightfully so as it ensures a strong seal from the elements (yes, you can place the Arlo outside).
Lastly, the base station needs to be powered on and plugged into your home’s top wireless router via the included ethernet cord.
Lastly, you’ll need to download the app to your Android or iOS device. There, the app will walk you through the pairing process of each camera you’d like to add (up to 15). If you are wondering whether there is a security camera with a two-way audio, read our Netgear arlo q camera review.
How to Add a New Arlo Smart Home Security Camera
- Just select “add a new device”
- Then the device you’re adding (Arlo, Arlo Q, etc) – in this case it’s “Arlo”
- Then, and almost lastly, how you’ll be connecting your new Arlo. In this instance you’ll be picking the “base station,” which should be included in your Arlo setup (provided you didn’t just buy a camera by itself). And yes, you’ll need the base station, unless you purchase a Netgear router that includes this functionality, which may or may not be available at the time of this review.
- And then finally hit the sync button on the base station and then the camera.
- If all does done right the two should pair and you should be able to access your new Arlo camera.
Arlo Battery Life
Now, for full disclosures sake I’ve only been using my Arlo for the better part of a few months. And because the Arlo’s battery is designed to last any where from 4-6 months it’s impossible for me to say what the outcome will be. That in mind, my battery indicator’s level has dropped about 40%. So safe to say I’ll probably get about 4-5 months of use. However, I haven’t followed all the steps to maximize my Arlo’s battery life, which are as follows:
- Head to Power Management Settings
- Select “Best Battery Life”. The caveat here is that you’ll trade video quality in favor of an extended battery.
- Alternatively, you can pick “Optimized” and this will strike a balance between video quality and battery life.
Note: Netgear specs the Arlo’s battery at 4-6 months. But keep in mind that’s based on “normal usage”, which is defined as 4 minutes of viewing or recording per day in the Optimized setting.
Arlo vs Dropcam
How does the Arlo compare to the Dropcam? They’re not wildly different. Save for the fact that the Dropcam is not 100% wireless. In fact, the Dropcam (now the Nestcam) is best compared to Netgear’s Arlo Q, a wired security camera as both are full HD (the Arlo wireless is just 720p, which is still HD).
Also, Dropcam charges for cloud storage of your recorded footage; it starts at $9.95 per month per camera for 7-days of storage. Ouch. Where as Netgear’s same offering is 100% free (7-days or 1GB of storage).
Arlo Subscription Plans and Cloud Storage
With the above in mind, Netgear does offer some paid plans, which include Premier or Elite. Premier provides up to 30 days of storage or 10GBs. The Elite plan bumps things to 60-days or 100GB of storage.
However, if you exceed 5 cameras on the base station, you’ll have to upgrade to the Premier plan, which will cost you $9.99/month or $99/year. Need to support more than 10 cameras? Then Elite it is, which supports up to 15 cameras for $14.99/month or $149/year.
Using the Arlo
If you’ve gotten this far reading my Arlo review, you’re probably interested in how easy it is to use and operate the Arlo camera. In short, the Arlo or Arlos are designed to be a “set it and forget it” scenario. Once installed and paired, any Arlo that detects motion will begin to record video. Unfortunately, the Arlos, save for the Arlo Q, don’t record audio, which is probably the biggest caveat of these wireless cameras. That and the fact you’ll have to replace the batteries at some point with no option to convert them to a wired power source.
Good to know: Optimal camera placement is 7 feet above the floor, aimed slightly down.
You’ll of course need an Android or iOS device to truly use the Arlo cameras, as the app can send you push notifications to your phone or tablet, or by way of email when it detects motion. You can set up a schedule as to when you’d like to receive these notifications. For instance, you may not want to receive notifications while you’re sleeping. Or perhaps the complete opposite; only when you’re sleeping.
Good to know: The best area for motion detection is five feet to 20 feet (1.5 to 6 meters) from camera position.
That in mind, it is easy to turn the Arlo on and off, along with the ability to schedule when the camera leverages its motion detection capabilities to record footage. There is also a motion sensitivity option, allowing you to reduce false alerts, such as a blowing tree branch, though you’ll need to test it to see what is right for you.
Because I’ve got my Arlo setup on my front door, which looks out onto a narrow path way with out a direct line of sight, there are times when there recording turns on a bit too late to garner a view of the person. But nevertheless, it’s still impressive, at least in my case, that it is able to record something with such short notice to hit the proverbial “record” button.
Night vision is available, though you can’t toggle it on and off; it’s automatic. It’s not full color, so you’ll have to settle with what is generally referred to as black and white. But it will probably suffice in most use cases.
When I first installed my front door Arlo, the signal seemed a bit spotty, especially when trying to access a live feed of the camera – yes, you can view a live feed, but be mindful of the battery implications. But after a few days of use, it some how became a non-issue.
With that in mind, the Arlo camera will need to be 300-feet or less from the Arlo base station (effectively where your router is) to maintain a connection. Your range will very depending on what is in between the camera and the base station. In my instance, I had one flight of stairs and for all intents and purposes a floor in between the two pieces of hardware. That and total distance of about 35 feet. And yes, it worked just fine, unlike some other wireless boxes I’ve tried to setup in my place, which sometimes seem to act like a giant faraday cage.
Final Thoughts
I’m astounded by how easy and simple it is to setup a Arlo wireless security camera. Just two screws and you’re done. However, because the cameras adhere to the mount using a magnet, you’ll want to ensure they’re out of reach of those passing by or can’t be seen by onlookers. Conversely, this makes swapping out the Arlo security cameras for another painless. And the same applies when it comes to installing new batteries when they die after 4-6 months of use.
Save for the fact that you might own a Nest thermostat – in which case it makes more sense to get a Nest/Dropcam – the Arlo Wireless security cameras should take priority on your shopping list over any other camera. And if you do seek a setup more analogous to that of the Nestcam, just look to the Arlo Q, which can fill any gaps (audio recording and no batteries) that the wireless Arlos can’t.
Read Next: Best Home Security System
![6 Best Outdoor Wireless Security Cameras in [year] 1 Best WiFi Video Camera|Best Outdoor Wireless Security Camera](https://www.gadgetreview.dev/wp-content/uploads/best-wifi-video-camera-300x205.jpg)
![6 Best Video Doorbells in [year] 2 Best Video Doorbells|Best Video Doorbells](https://www.gadgetreview.dev/wp-content/uploads/wifi-doorbell-300x161.jpg)
