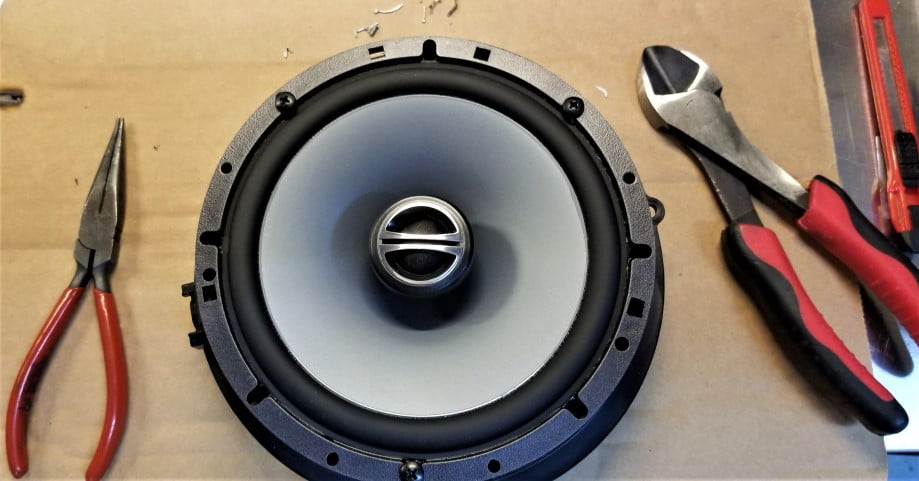
There is hardly anything more frustrating than recognizing that one of the best speakers in your system has developed sound issues. And, you’re just hoping it’s not a blown speaker that you have to repair. Knowing how to test speaker wire with a digital multimeter is crucial to keeping a well-greased audio machine. It’s a bit easier than repairing stereo speakers. And for those who are looking for further advice on their sound systems, you can check out our article that covers how to test if speakers are wired correctly.
KEY TAKEAWAYS:
- You can test a speaker wire by setting the digital multimeter to ‘resistance (Ω)’ mode and connecting the leads to either end of the wire.
- If you run this test and get anything above 0 Ohms, your speaker wire is good.
- If your speaker wire reads 0 Ohms, it is bad or damaged and has to be replaced.
How to Check Speakers With a Multimeter
Resistance is a measure that calculates current and voltage and is calculated by Ohms. Testing for resistance is an easy way to check if you have a damaged or broken speaker positive or negative wire. Below we’ll show you a few simple steps to test every single wire with a multimeter tool.
Insider Tip
For the most accurate reading, touch the red and black probe together before testing to check that the leads are working and that the battery life is good. The reading should be 0 or very close to 0.
We also have a resource that explains how to wire speakers to an amp for those looking further increase their audio handiwork.
STEP 1
Make sure any power plugin in your sound system is removed from the wall socket. When testing, having live wires can be dangerous both to you and the equipment.
STEP 2
Unclip or unwrap all the speaker wires from the positive and negative speaker terminals. Then, go to the stereo and remove the wires as well.
STEP 3
Get out the multimeter and switch it to the resistance setting. This setting is often represented by an Ohms symbol (Ω).
STEP 4
Set the red (positive) and black (negative) multimeter leads to both ends of the speaker wire. If the multimeter shows a resistance reading (or infinite resistance), the wire works. If the multimeter reads no Ohms or shows the message ‘OL,’ then the wire is bad, and you’ll have to replace the wire.
Warning
Don’t run a test if your multimeter reads anything other than slightly over 0 Ohms when you turn it on. Using a bad multimeter can lead to faulty readings, increasing the likelihood of damage to your equipment.
F.A.Q.S
How can you test for speaker polarity using the battery method?
Place each speaker wire on either end of a 9V battery. Then, watch the speaker cone to see if it moves in or out. If it moves out, you have correct polarity, and if it moves in, you have reversed polarity (or incorrect polarity).
Can you test a speaker with a multimeter?
To test a speaker connection with a multimeter, touch the leads to both the positive and negative terminal. If the speaker shows a very low or very high Ohm reading, you either have a short or a bad connection. On the other hand, if the reading is close or accurate, the speaker is fine.
How do I test a tweeter?
Testing a tweeter is the same as testing any speaker with a multimeter. Place the positive and negative leads to the correct speaker terminals and check for resistance.
STAT: When testing speakers (not speaker wire) with a multimeter, resistance should be about 15-20% less than the labeled impedance. For example, if you have an 8 Ohm speaker and get a 6-7 Ohm reading, the speaker is good. (source)
REFERENCES:
- https://handtoolsforfun.com/how-to-test-speaker-wires-with-a-multimeter/
- https://www.sweetwater.com/sweetcare/articles/how-to-test-a-speaker/#:~:text=To%20use%20the%20multimeter%2C%20set,either%20terminal%20when%20reading%20resistance.
- https://multimetertools.com/how-to-test-a-speaker-with-a-multimeter/r
- https://hddmag.com/how-to-test-your-speaker-wiring-to-check-if-its-faulty/
- https://www.youtube.com/watch?v=zmiTlJnf_E0








![Best Powered Speakers in [year] 27 Best Powered Speakers in 2026](https://www.gadgetreview.dev/wp-content/uploads/best-powered-speakers-image.jpg)
![Best Stereo Speakers in [year] 28 Best Stereo Speakers in 2026](https://www.gadgetreview.dev/wp-content/uploads/best-stereo-speakers-image.jpg)
![Best SoundBar in [year] ([month] Reviews) 29 Best SoundBar in 2026 (January Reviews)](https://www.gadgetreview.dev/wp-content/uploads/best-soundbar-image.jpg)
![Best Subwoofers in [year] ([month] Reviews) 30 Best Subwoofers in 2026 (January Reviews)](https://www.gadgetreview.dev/wp-content/uploads/best-subwoofer-image.jpg)
![Best TableTop Radio in [year] ([month] Reviews) 31 Best TableTop Radio in 2026 (January Reviews)](https://www.gadgetreview.dev/wp-content/uploads/best-tabletop-radios-image.jpg)
![Best 8 Inch Subwoofers in [year] 32 Best 8 Inch Subwoofers in 2026](https://www.gadgetreview.dev/wp-content/uploads/best-8-inch-subwoofer-image.jpg)
![Best Surround Sound Systems in [year] 33 Best Surround Sound Systems in 2026](https://www.gadgetreview.dev/wp-content/uploads/best-surround-sound-system-image.jpg)
![Best Laptop Speakers in [year] 34 Best Laptop Speakers in 2026](https://www.gadgetreview.dev/wp-content/uploads/best-laptop-speakers-image.jpg)
![Best Wireless Surround Sound Speakers in [year] 35 Best Wireless Surround Sound Speakers in 2026](https://www.gadgetreview.dev/wp-content/uploads/best-wireless-surround-sound-image.jpg)
![Best Bose Speakers in [year] 36 Best Bose Speakers in 2026](https://www.gadgetreview.dev/wp-content/uploads/best-bose-speakers-image.jpg)
![Best Home Stereo Systems in [year] 37 Best Home Stereo Systems in 2026](https://www.gadgetreview.dev/wp-content/uploads/best-home-stereo-system-image.jpg)
![Best WiFi Speakers in [year] 38 Best WiFi Speakers in 2026](https://www.gadgetreview.dev/wp-content/uploads/best-wifi-speakers-image.jpg)
![Best Wireless Home Theater Systems in [year] 39 Best Wireless Home Theater Systems in 2026](https://www.gadgetreview.dev/wp-content/uploads/best-wireless-home-theater-system-image.jpg)
![Best Party Speakers in [year] 40 Best Party Speakers in 2026](https://www.gadgetreview.dev/wp-content/uploads/best-party-speakers-image.jpg)
![Loudest Bluetooth Speakers in [year] 41 Loudest Bluetooth Speakers in 2026](https://www.gadgetreview.dev/wp-content/uploads/loudest-bluetooth-speaker-image.jpg)
![Best Car Speakers for Bass in [year] 42 Best Car Speakers for Bass in 2026](https://www.gadgetreview.dev/wp-content/uploads/best-car-speakers-for-bass-image.jpg)
![Best Marine Speakers in [year] 43 Best Marine Speakers in 2026](https://www.gadgetreview.dev/wp-content/uploads/best-marine-speakers-image.jpg)
![Best JBL Speakers in [year] 44 Best JBL Speakers in 2026](https://www.gadgetreview.dev/wp-content/uploads/best-jbl-speakers-image.jpg)
![Best Home Theater Speakers in [year] 45 Best Home Theater Speakers in 2026](https://www.gadgetreview.dev/wp-content/uploads/best-home-theater-speakers-image.jpg)
![Best Waterproof Speakers in [year] 46 Best Waterproof Speakers in 2026](https://www.gadgetreview.dev/wp-content/uploads/best-waterproof-speaker-image.jpg)


